September, 2013. Salt Lake City, Utah just hosted its first ever Comic Con with record breaking numbers! Initially, they only expected 10,000 to 20,000 people (which would still be larger than any other science fiction or fantasy convention held in Utah to date), but as it turns out, Salt Lake has a much larger population of geeks and nerds than anyone could have predicted. Over 70,000 tickets were sold, and thousands more were turned away because the convention center reached capacity.
One of the biggest draws at Comic Con was the cosplay--an opportunity for fans to recreate their favorite character's costumes, weapons and props--art conceived for comic books, television or the movies. It's a way for us to show our devotion and appreciation for the genre and an artful hobby for those with the skills.
I love cosplay. I love costuming of any kind. I'm a turbo geek and a gamer girl to boot! And since this was the first Comic Con in Salt Lake, I wanted to do something really special--something unforgettable. A cosplay creation you weren't likely to see fifty of at the convention.
A few of the options I toyed with: Samus from Metroid, Chell from Portal, Lilith from Borderlands 2, Leela and Bender from Futurama, or a Mario Kart character (would need a bunch of my friends to join in to make that one fun). I should also add that I needed to choose something my fiance Chris and I could do together since we were attending together and it would be sad if only one of us had a cool costume. That ruled out Samus and Chell (as funny as it would have been to see Chris dressed up as the companion cube). Lilith and Zero would have been cool, but I was worried that Borderlands would be overdone. Leela and Bender were on the list for sure, but I figured if I was going to go through the trouble of crafting a suit, it may as well be one I was certain would get the biggest reaction. So in the end, we chose the most difficult costume possible. The Big Daddy from Bioshock. Notice I say "we". I knew I'd need help on this, and Chris was in whether he wanted to be or not. Lucky for me, he's extremely supportive and encouraging. If it weren't for him, this project would have never seen the light of day.


Okay then, enough of the back story. Let's get started.
There's an extremely long list of supplies that you'll need. In fact, be prepared to spend somewhere around $400 bucks--more if you have to buy equipment or tools. To make the supply lists more manageable, I'll break them down for each piece of the Big Daddy costume.
BIG DADDY'S BODY
What you need:
10 sheets of Foam Core Board - Dollar Store, $1.00 each. (The walmart stuff for $1.50 is stronger.)

4 to 6 large cardboard boxes - Free from the grocery bakery

Small Hot Glue Sticks (I think we went through about 150 sticks total - Dollar Store, 20 for $1.00 or Walmart, 30 for $2.00

Hot glue gun - Walmart, $3.00

Box cutter/Retractable Utility Knife - Home Depot, $5.00

MC foam --approximately 300 square feet (2 sheets of 50" x 72") - We got it from a friend as a donation (Thanks Fitz!!). Not sure where to buy it otherwise.

10 cans GE Insulating Foam (Big Gap Expanding) - Walmart, $3.00 each
.jpg)
2 rolls Clear Packing Tape - Walmart, $2.00 each

Electric Turkey Carver - Walmart, $25.00 (We borrowed one from a friend--Thanks Chuck!)

3 cans Dap Contact Cement / Weldwood - Walmart, $7.00 each

2" Foam Brushes - Walmart, $0.50 each

Heat Gun - Harbor Freight, $10.00

Dremel Sanding Tool - Harbor Freight - $20.00

1 roll 1" Masking Tape - Walmart, $1.50


5 cans Rust-oleum Metalic and Hammered Spray Paint - Walmart, $5.00 each

Measuring Tape (The kind for sewing)

Yard Stick

Reference Pictures:
First things first--reference pictures from the www! We started off with the non-colored image released by 2K Games:

I printed it off on a piece of graph paper so I could get an idea of the measurements:
.jpg)
For a 6' tall person, each square represents approximately 4".
Unfortunately, we discovered later that the dimensions and shapes of this image were a bit off from what we wanted the final version to look like. The one we switched to (and liked the shape of better) is this one:

The Shoulder Guard:
The Shoulder Guard is made from a piece of cardboard. It's mainly so that the suit would have something to rest on and disperse the weight.
.jpg)
Note: Make sure the corrugate in the cardboard is horizontal instead of vertical so that it bends over the shoulder. Cut a hole just big enough for your head. You'll end up trimming the shoulders down a few inches so that in the end its about as wide as your own shoulders.
The Skeleton:
You'll need to tape two pieces of foam board together with packing tape in order to get a sheet large enough. Draw out the side silhouette of the suit.

Cut out 4 of them using your utility knife.

Make about 20 of these little T-supports using foam board and tape or hot glue. 10 should be for the inner frame (ours were 7" wide), 10 for the mid frame (5" wide).

Put your 4 frame/skeleton pieces together using the T-supports. Hot glue them in place.
Note: We reinforced our 2 center frame pieces with cardboard. You could probably just double up your foam core board.


Cut out the outer frame piece/arm hole, make 8 more T-supports (5"), and hot glue them on in the same manner (our T's were 1" wider on the top than the bottom so the arm hole would be slightly angled:


Trim 2" to 3" off the top and bottom of the mid-frame pieces so you'll have the correct shape. Bridge the open space between the frame pieces with slats of of foam board or cardboard. Hot glue in place about 1" deep to leave room for the expanding insulation foam.
.jpg)
.jpg)
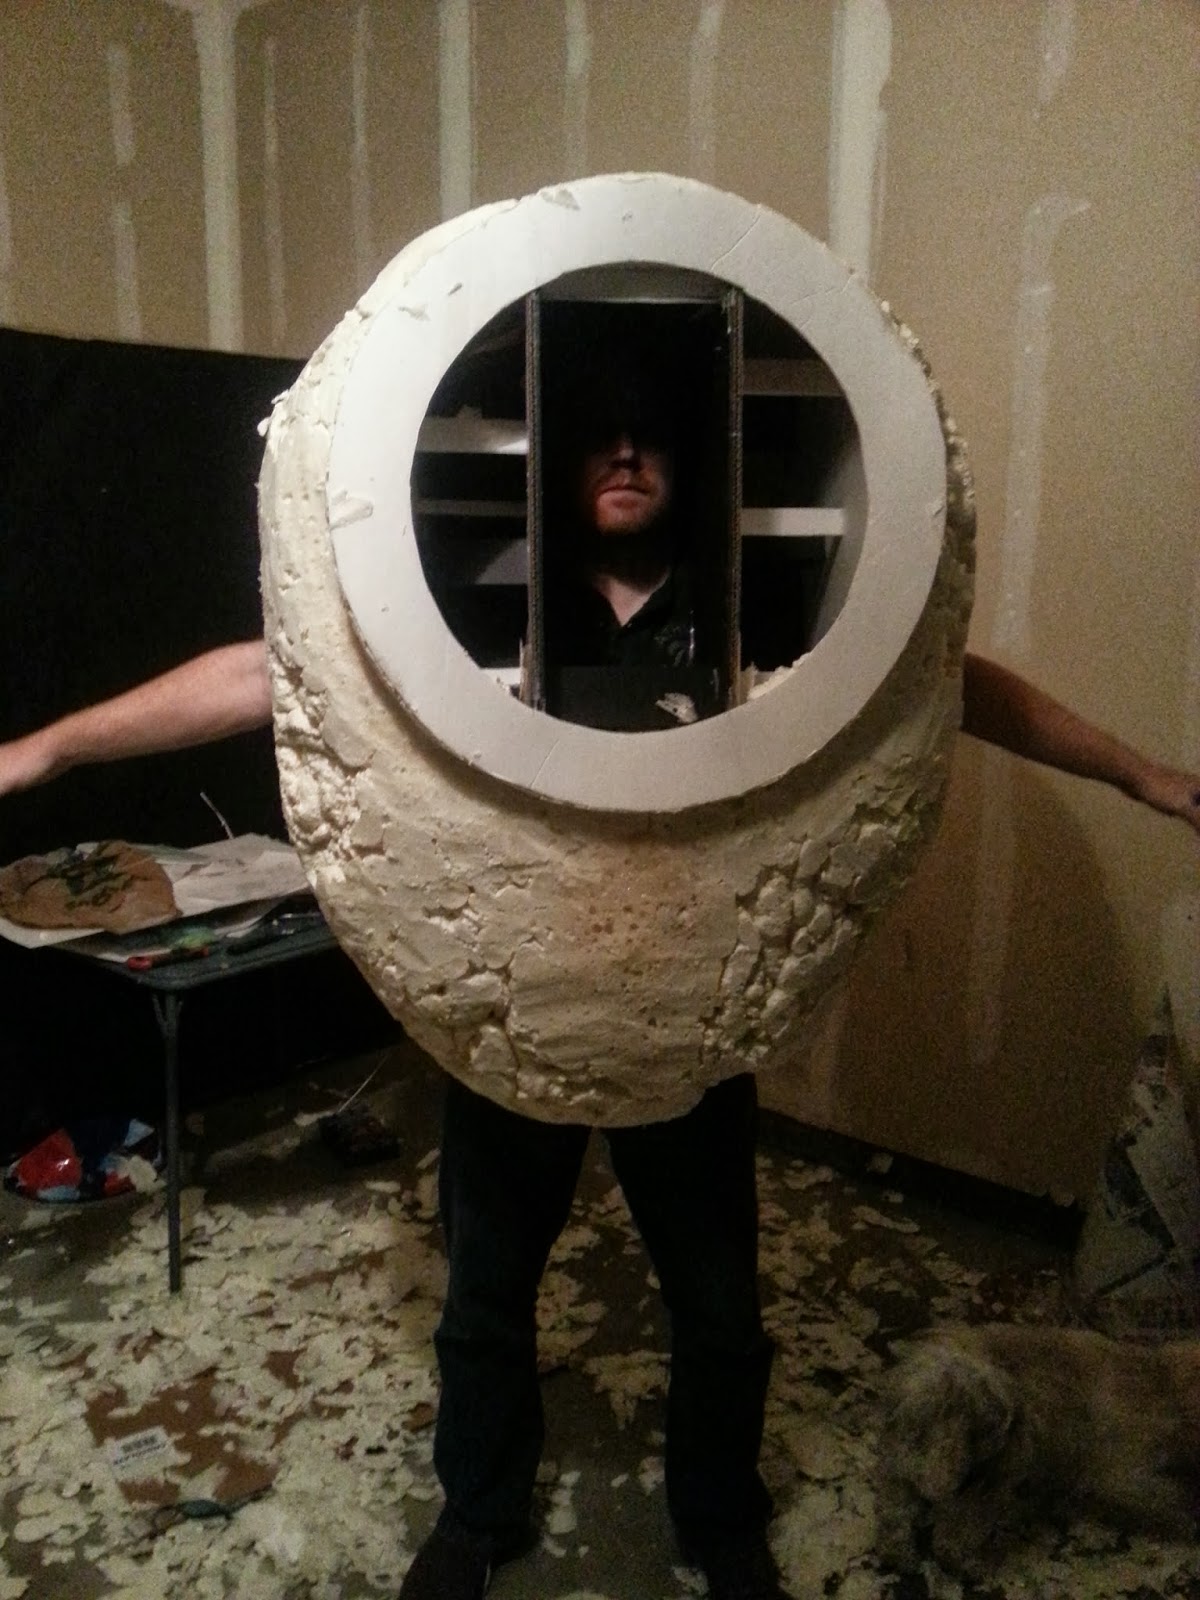
Try it on to make sure you have the basic shape right.

.jpg)
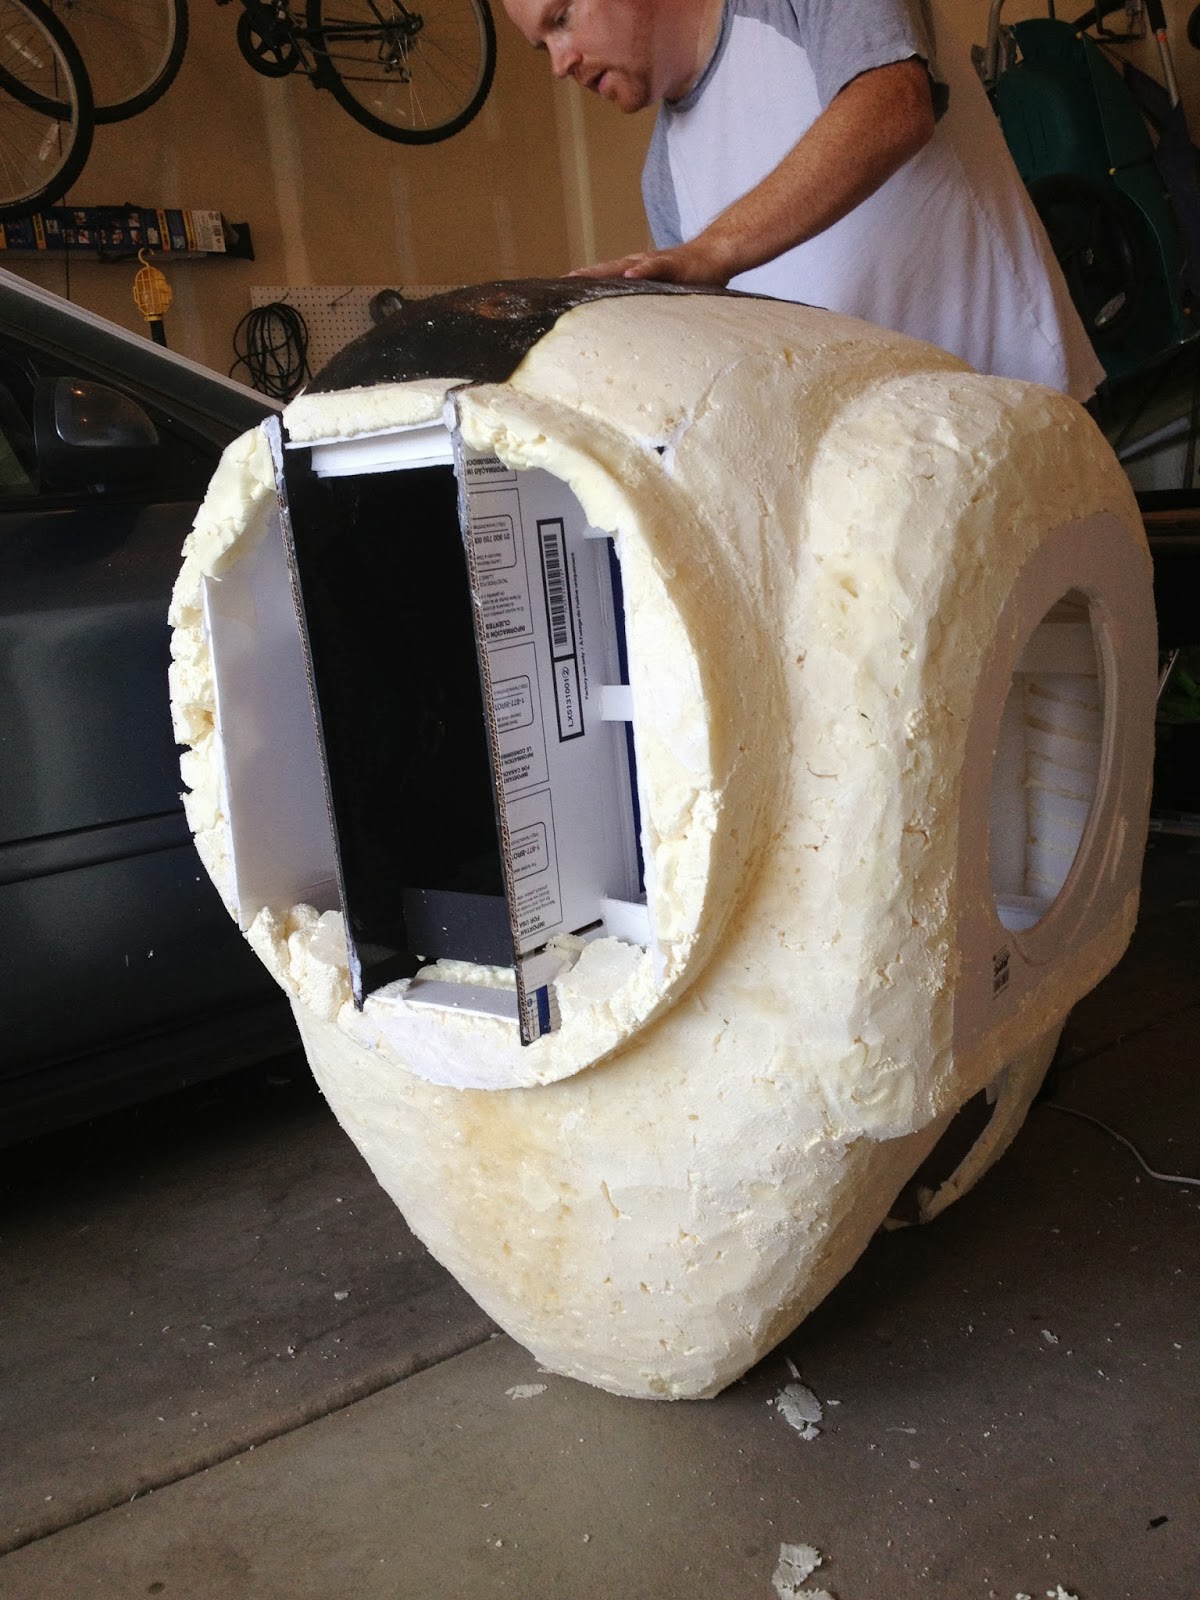
Shaping:
Cut a place-holder ring for the dome. Fill the skeleton with expanding insulation foam. (These images were taken after I carved it down a bit--as you can see from all the foam scraps on the floor.)


Carve it down with an Electric Turkey Carver until you have the shape you want (I recommend carving right down to the skeleton, then you know its the right dimensions.)

Sand it smooth.
Note: The black section on top is the first strip of MC foam we glued on. It looked lumpy, and we then realized that the suit needed to be sanded before we put the rest of the MC foam on.


Note: I felt like the arm holes were too low, so I carved a piece off the top and glued it to the bottom. Hind sight, I should have left them lower because it would have been easier on Chris' arms.
The Shell:
Glue the MC foam on in pieces using a heat gun to shape the foam to the curves. We used Dap Contact Cement (Weldwood) and foam brushes. This stuff destroys Styrofoam, but works great on insulation foam and MC foam. Go figure.


Use a dremel to sand the edges smooth. Alternatively, you may be able to cut your MC foam so it buts right together with no overlap, and thus, no need to sand. Fill your gaps with silicone sealant (or some similar paint-able gap filler).

The Apron and Top Ridge:
The Apron is cut from a large piece of cardboard with a sliver of Styrofoam taped beneath it to make it stand out a bit.
.jpg)
We put a piece of MC foam over the top to keep it consistent looking with the rest of the body, then added the trim and bolts with more MC foam.
I added the top ridge after the body was covered with MC. It's made of thicker pieces of MC foam, cut and shaped. I glued it on with Dap contact cement, then hot glued on the little bolts made from MC foam.

THE DOME AND CAGE
What you need:
55cm Yoga Ball - Walmart, $9.00

2 Sunday Newspapers - Free from my mom

5lb. bag of White Flower - Walmart - $5.00

Fiberglass Resin - Home Depot, $15.00

Fiberglass Cloth - Home Depot, $7.00

3" PVC Insulating Bushing x 8 (found in the electrical piping and fittings section) - Home Depot, $3.00 each

3" Clear Red Plexiglas x 8 (From gdesingsinc.com) - Free cuz he's a client

3 sets of large bolts, nuts and washers - Home Depot, $0.20 each

2" PVC Plumbing Adapters x 2 - Home Depot, $3.00 each

Battery Powered Mini Fan - Home Depot, $5.00

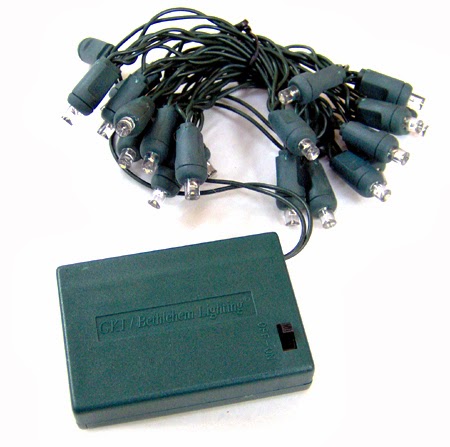
Battery Powered White Christmas Lights - Hobby Lobby, $3.00
50' of 1/2" Poly Tubing - Home Depot (Sprinklers and Plumbing section), $10.00

3/4" PVC Cross Joint x 4 - Home Depot, $2.00 each


3/4" PVC T-Joint x 4 - Home Depot, $1.50

Construction:
First, blow up your yoga ball. Set it in a laundry basket so it doesn't roll around.
Cover a little over half of the ball with 2 or 3 layers of newspaper and paper mache paste. (Make sure you don't cover the hole of the ball--cuz you're gunna wanna deflate it later.)
Before it's dry, put a layer of fiberglass resin and fiberglass cloth over the paper mache. The cloth will stick to the wet paper mache making it really easy to do your first layer.
Let it dry.

Note: Hind sight, I should have just bought a clear acrylic security camera dome online like Volpin props, but I thought I could do it cheaper with resin. I was wrong. The materials ended up being about the same price, and a lot more work. If you're doing a suit, save yourself some stress. Go here and buy a dome: http://www.replacementdomes.com/. Be sure to get one with a flange. I think they're about $60.00 before shipping.
Sub-Note: The up-side of using a home-made fiberglass dome instead of an acrylic dome is that the holes were super easy to cut out. It was probably lighter than acrylic too.
Next, deflate your yoga ball and pull it out. Trim the excess paper and resin of the rim to make it sit flat. Cut a large circle out of foam core and put inside the dome to make sure it keeps its round shape during the next few steps. Set your dome on a piece of foam core wide enough to make the flange and slap on a second coat of paper mache, building a 2" flange out around the dome.
Put on another layer of fiberglass and resin.
Let it dry.
Do one last layer of paper mache to make the surface mostly smooth.
Let it dry.

Cut the foam core out around the 2" flange. Hopefully, if you did everything right, you should end up with a 24" to 26" total diameter flanged dome.
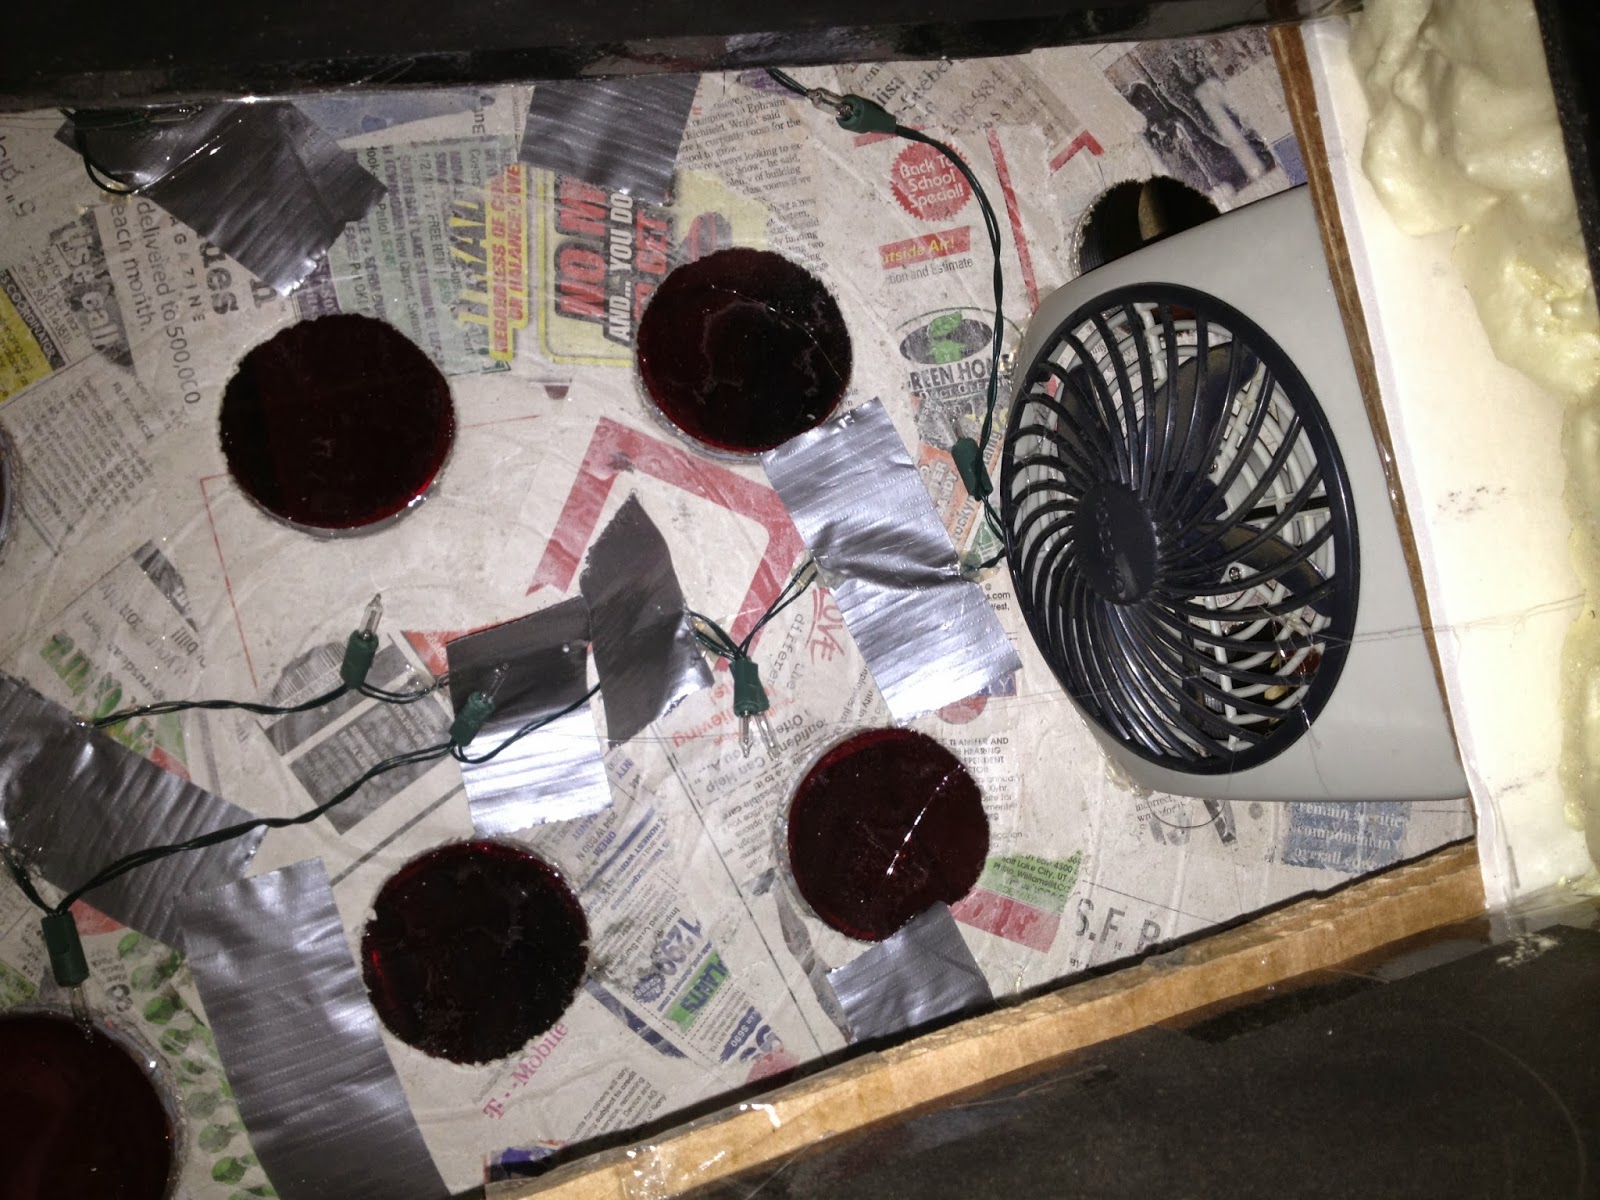
Now measure and cut your holes using a drill, and hole cutting drill bits. Eight 3" holes, and two 2" holes.

Now would be a good time to put in your fan(s) and lights. We attached the fan to the inside bottom of the dome right over the two 2" portholes using hot glue. The lights were taped, then secured with hot glue. (I'm a fan of hot glue... can you tell?) Put the lights in between the portholes rather than over them. This will give you an ambient light instead of little Christmas light dots shining through the plexiglass.

Cut another circle out of foam core the same diameter as your flanged dome. Reinforce it with a second layer of cardboard or foam core and glue or tape them together. Cut out a square to see through. Secure the reinforced circle to the front of your suit. We did this by sandwiching the inner boards with two small squares of wood, then screwing the circle into the wood with screws and washers.

Next, make the collar of your dome by cutting another circle the width of your flanged dome, but also cutting out the inside so you can fit it over the outside of your dome. Clamp the suit, dome and collar together. Measure your bolt holes evenly and drill. Insert bolts and secure with washers and nuts. (This construction method gives you a detachable dome!)
.jpg)
Note: We started with 8 bolts, I think, but ended up just using 3. I used MC foam to make some faux bolts and washers and hot glued them on to fill the spaces later. This saved on a little weight.
.jpg)
Next, hot glue your plexiglass into the bushings and hot glue your bushings onto the dome.
Note, we used red plexiglass, but if we had to do it again, we'd probably do clear and put both red and yellow lights inside so Big Daddy could switch from neutral to angry.
.jpg)
The Cage:
The long front bar of the cage is all one piece. The side sections were measured and cut, then taped so we could adjust it. The Poly tubing we used wasn't really as heat mold-able as we would have liked, but it was pretty flexible on its own. When all the pieces looked to be in the right place, we removed the tape, and hot glued them in.
.jpg)
.jpg)
Note: The connector pieces on the sides of the dome (the three pipe coupling joint), and the ones on the front and top are actually lids from our spray paint cans. I would have preferred to use some PVC pipe parts like we did on the other joints, but we were out of money and out of time.
Now you're ready for paint!
Since most of the other suit pieces will undergo the same painting process, we'll do that in a separate post at the end.
Tune in tomorrow to see how to make BIG DADDY'S ARMS!
So great to meet you at the Zermatt Resort this weekend! Wow, you guys weren't kidding that this costume was Epic!! Nicely done.
ReplyDeleteBrandt Roney
brandtroney@usana.com